In this tutorial we will learn how to create role based authentication using laravel 8 framework. In order to create proper authentication mechanism we need to install laravel 8 framework locally.
If you do not know how to do this process please go through my previous article link provided below:
Install Laravel 8 Auth Package
Laravel comes with built in authentication feature however in laravel 8 this package is seperated and needed to be installed. This package is called laravel breeze.
Laravel breeze comes with following features:
- login
- registeration
- password reset
- email verification
- password confirmation etc..
It uses blade templates for all auth routes. Let's get to it and install laravel breeze. Once you installed laravel 8 project locally as shown in my previous tutorial we can now begin with authentication.
Open your terminal window and type following commands one by one to install laravel breeze.
# spin up your docker app
./vendor/bin/sail up -d
# run migrations first
./vendor/bin/sail artisan migrate
# install composer package for breeze
./vendor/bin/sail composer require laravel/breeze --dev
# once composer library installed we run following install command
./vendor/bin/sail php artisan breeze:install
# compile css files
./vendor/bin/sail npm install
./vendor/bin/sail npm run devAt this point laravel breeze is installed and you can now hit following urls:
- Login Page: http://localhost/login
- Register Page: http://localhost/register
Let's create a sample user to login with hit http://localhost/register in your browser and create a test user. It will show following page:
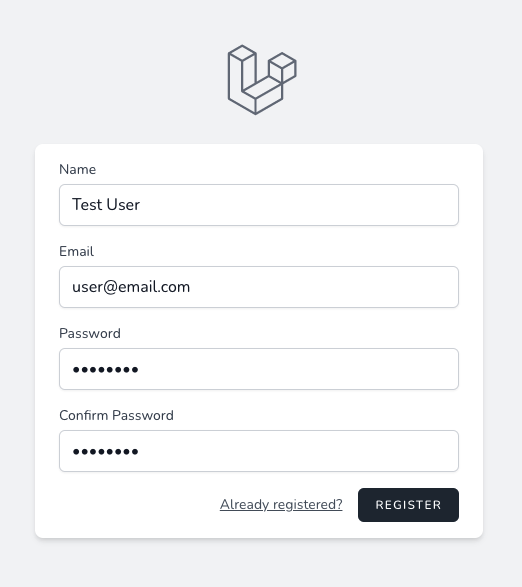
It will create a new user and logs you in.
Adding Role column to users table
Now, so far we have basic authentication process however we want to create role based authentication process. In order to do that we would have to add a new column called role in our users database table.
Let's create a new migration to add role column to users table. Open your terminal window and go to your project directory and type following command:
# create a new migration for role column
./vendor/bin/sail artisan make:migration add_role_column_to_users
Now, open your newly created migration file and following line of code:
<?php
use Illuminate\Database\Migrations\Migration;
use Illuminate\Database\Schema\Blueprint;
use Illuminate\Support\Facades\Schema;
class AddRoleColumnToUsers extends Migration
{
/**
* Run the migrations.
*
* @return void
*/
public function up()
{
Schema::table('users', function (Blueprint $table) {
$table->enum('role', ['user','admin'])->default('user');
});
}
/**
* Reverse the migrations.
*
* @return void
*/
public function down()
{
Schema::table('users', function (Blueprint $table) {
$table->dropColumn('role');
});
}
}Once you upgrade the migration file its time to run our new migration file. Open terminal again and type following command:
# run the migration for role column
./vendor/bin/sail artisan migrateNow, you have a new column added to your users table. For purpose of our tutorial we wont be messing with views however let's create a new admin user and manually update his role in database.
Go to http://localhost/register page and create a new admin user as shown below:

Now, that a new admin user is added in the database go to your database and change role to this new user to admin. As shown below now you have two users one with user role and one with admin role.

Add method to User Model to identify user role
We need to add a new method in User Model so that we can use this method to identify appropriate user. Open your app/Models/User.php file and add following changes:
<?php
namespace App\Models;
use Illuminate\Contracts\Auth\MustVerifyEmail;
use Illuminate\Database\Eloquent\Factories\HasFactory;
use Illuminate\Foundation\Auth\User as Authenticatable;
use Illuminate\Notifications\Notifiable;
use Laravel\Sanctum\HasApiTokens;
class User extends Authenticatable
{
use HasApiTokens, HasFactory, Notifiable;
/**
* The attributes that are mass assignable.
*
* @var array
*/
protected $fillable = [
'role',
'name',
'email',
'password',
];
/**
* The attributes that should be hidden for arrays.
*
* @var array
*/
protected $hidden = [
'password',
'remember_token',
];
/**
* The attributes that should be cast to native types.
*
* @var array
*/
protected $casts = [
'email_verified_at' => 'datetime',
];
/**
* @param string $role
* @return bool
*/
public function hasRole(string $role): bool
{
return $this->getAttribute('role') === $role;
}
}Understand laravel request flow
In order to achieve our task first of all we need to understand how laravel process a web request:
- user comes to a website using url
- laravel finds url tied to a controller function using routes
- then request goes through middlewares if defined any
- then request goes to controller and process the view
So before a request actually goes to a controller it goes through middleware.
What is Laravel middleware?
Middleware is a layer between a user request and a controller. Basically, you can perform additional logics here before our request hits a controller. We would have two create two different middlewares one for user and one for admin.
Purpose of creating these middlewares:
- All routes that user has access to uses user middleware
- All routes that admin has access to uses admin middleware
Open your terminal and create following route middlewares:
# create new auth middleware for user routes
./vendor/bin/sail artisan make:middleware UserAuthenticated
# create new auth middleware for admin routes
./vendor/bin/sail artisan make:middleware AdminAuthenticatedCreating new route for admin
Let's add a new route for our admin dashboard page. Open routes/web.php file and add new route as shown and add admin/user middleware to appropriate routes.
<?php
use Illuminate\Support\Facades\Route;
/*
|--------------------------------------------------------------------------
| Web Routes
|--------------------------------------------------------------------------
|
| Here is where you can register web routes for your application. These
| routes are loaded by the RouteServiceProvider within a group which
| contains the "web" middleware group. Now create something great!
|
*/
Route::get('/', function () {
return view('welcome');
});
// USER DASHBOARD
Route::get('/dashboard', function () {
return view('dashboard');
})->middleware(['auth', 'user'])->name('dashboard');
// ADMIN DASHBOARD
Route::get('/admin_dashboard', function () {
return view('admin_dashboard');
})->middleware(['auth', 'admin'])->name('admin_dashboard');
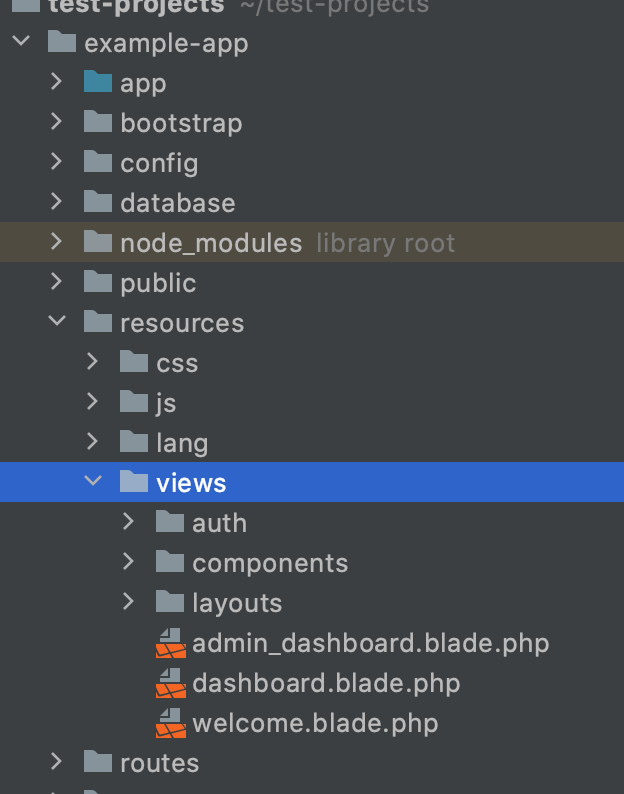
require __DIR__.'/auth.php';Notice above we added a new route for admin now we need to create a new dashboard page for our admin. Go to resource/views and copy dashboard.blade.php and create a new file called admin_dashboard.blade.php as shown below:
Updating user/admin dashboard view files
We would make small change to our user/admin dashboard view so that we know we are logged as a correct user and rendering correct view for each user. Open resources/views folder and make some small text changes to following views:
- dashboard.blade.php => You're logged in as User
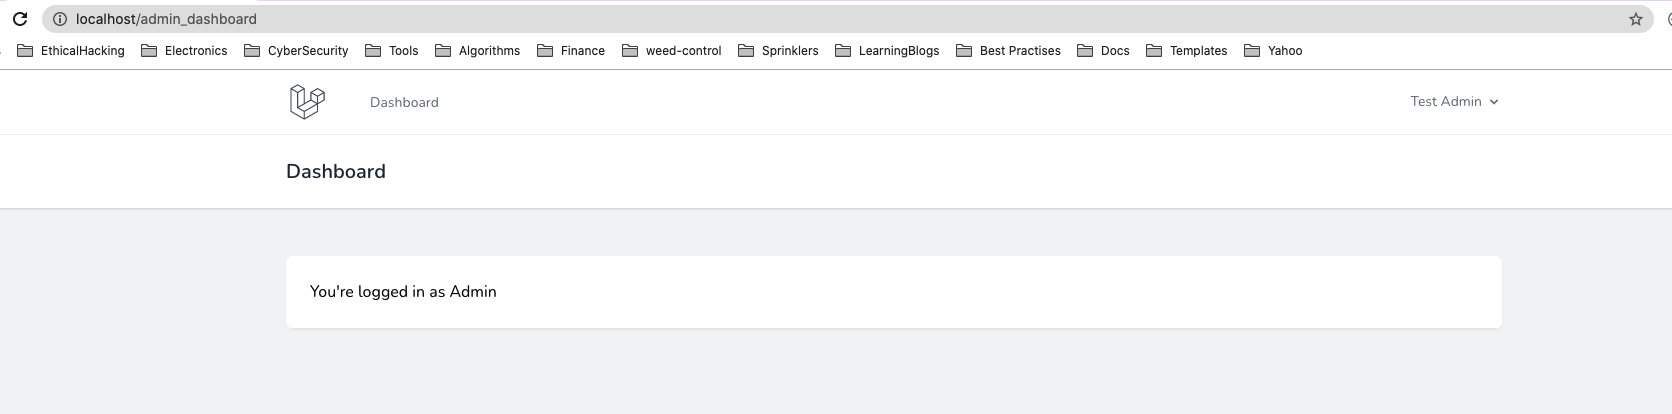
- admin_dashboard.blade.php => You're logged in as Admin
Alright, so far we have updated routes and view files. Now, open our newly created middleware files and make following changes:
example-app/app/Http/Middleware/AdminAuthenticated.php:
<?php
namespace App\Http\Middleware;
use Closure;
use App\Models\User;
use Illuminate\Http\Request;
use Illuminate\Support\Facades\Auth;
class AdminAuthenticated
{
/**
* Handle an incoming request.
*
* @param Request $request
* @param Closure $next
* @return mixed
*/
public function handle(Request $request, Closure $next)
{
if( Auth::check() )
{
/** @var User $user */
$user = Auth::user();
// if user is not admin take him to his dashboard
if ( $user->hasRole('user') ) {
return redirect(route('dashboard'));
}
// allow admin to proceed with request
else if ( $user->hasRole('admin') ) {
return $next($request);
}
}
abort(403); // permission denied error
}
}example-app/app/Http/Middleware/UserAuthenticated.php:
<?php
namespace App\Http\Middleware;
use Closure;
use App\Models\User;
use Illuminate\Http\Request;
use Illuminate\Support\Facades\Auth;
class UserAuthenticated
{
/**
* Handle an incoming request.
*
* @param Request $request
* @param Closure $next
* @return mixed
*/
public function handle(Request $request, Closure $next)
{
if( Auth::check() )
{
/** @var User $user */
$user = Auth::user();
// if user is not admin take him to his dashboard
if ( $user->hasRole('admin') ) {
return redirect(route('admin_dashboard'));
}
// allow admin to proceed with request
else if ( $user->hasRole('user') ) {
return $next($request);
}
}
abort(403); // permission denied error
}
}example-app/app/Http/Middleware/RedirectIfAuthenticated.php:
We also have to edit following middleware which actually redirects users when user is logged in. We have to redirect admin to his dashboard and user to his own dashboard.
<?php
namespace App\Http\Middleware;
use Closure;
use App\Models\User;
use Illuminate\Http\Request;
use Illuminate\Support\Facades\Auth;
class RedirectIfAuthenticated
{
/**
* Handle an incoming request.
*
* @param Request $request
* @param Closure $next
* @param string|null ...$guards
* @return mixed
*/
public function handle(Request $request, Closure $next, ...$guards)
{
$guards = empty($guards) ? [null] : $guards;
foreach ($guards as $guard) {
if (Auth::guard($guard)->check()) {
/** @var User $user */
$user = Auth::guard($guard);
// to admin dashboard
if($user->hasRole('admin')) {
return redirect(route('admin_dashboard'));
}
// to user dashboard
else if($user->hasRole('user')) {
return redirect(route('dashboard'));
}
}
}
return $next($request);
}
}Activate our newly created middlewares
Next, after we created our middlewares we need to activate them. By default laravel is not aware of our new middlewares so let's activate them.
Open app/Http/Kernel.php file and add following two lines:
<?php
namespace App\Http;
use Illuminate\Foundation\Http\Kernel as HttpKernel;
class Kernel extends HttpKernel
{
// some other functions
protected $routeMiddleware = [
'user' => \App\Http\Middleware\UserAuthenticated::class,
'admin' => \App\Http\Middleware\AdminAuthenticated::class,
];
}Finally, we are done with changes. Go to your web browser and hit http://localhost/login and try login as user and then as a admin. You will be redirected to appropriate dashboard for each user.
Important Tip:
Use laravel route group feature and add your user/admin protected routes to appropriate group so that you do not need to worry about who logs in. Checkout following example:
// user protected routes
Route::group(['middleware' => ['auth', 'user'], 'prefix' => 'user'], function () {
Route::get('/', 'HomeController@index')->name('user_dashboard');
Route::get('/list', 'UserController@list')->name('user_list');
});
// admin protected routes
Route::group(['middleware' => ['auth', 'admin'], 'prefix' => 'admin'], function () {
Route::get('/', 'HomeController@index')->name('admin_dashboard');
Route::get('/users', 'AdminUserController@list')->name('admin_users');
});