Why we need unit tests?
Laravel framework is buit with testing in mind. If you are working on small or large scale application and you want to make sure that each part of your website is functioning properly it is crucial to write unit tests.
Unit tests make sure that your functionality works smoothly without breaking your app. Let say that you are working on large scale application you started writing your app without considering unit tests.
As your app grows you need to modify existing functionality and you may not be aware that your changes will break some part of your web application. You wont be able to test each part of your website whenever you make change.
Let say that you are working on payment system for your website and somehow you broke the existing logic. If you did not have unit tests writting you will not know immedietly that you broke some previous logic you might not even remember the previous logic because you worked on the code after so long therefore when your customer start complaining about the payment system is broken you are too late now.
At this point you first have to remember the previous logic and accomodate your new logic around it. If you forgot previous logic and you try to fix something without any other consideration it will break more stuff.
Let say that you had the unit tests written what happens. When you write new logic on top of your existing functionality your unit test will break and it will force you to fix them and because you have written unit tests and added some description around each unit test you will remember what each tests are doing and you will change them one by one and mofdify them according to new business logic without affecting other part of the code.
Your unit test should cover 100% of your application so that you can be sure that when unit tests are broken and you fix them your website will not be broken,
What are the different types of Unit Tests?
There are mainly two types of unit tests we write in Laravel Application as shown in diagram below:
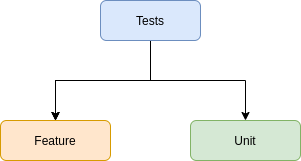
Feature Tests: Feature tests are written to test larger functionality of your website. For example: if your site has payment functionality you can write feature test to test whole payment functionality.
- You can test controllers
- You can test models
- You can test Form Requests
- You can test entire feature
Unit Tests: Unit tests are used to test on very small isolated portion of your code for example: A class or some small function which are independent of database connection or not part of Laravel ecosystem.
Unit tests do not boot Laravel application and therefore you wont be able to access database connection or any other framework services.
- You can test some helper class and each function of your helper class
- You can test some custom functions that you wrote that do not depend on any core laravel functionality
How does Laravel Unit test work?
Laravel supports PHPUnit tests by default. Your web app comes with phpunit.xml file with all necessary settings you need in order to test your Laravel application.
Your phpunit.xml file sets your laravel environment to testing by default. Laravel will also automatically configure your session and cache to array driver by default however you can change these settings according to your need.
Here is the sample phpunit.xml file that comes with Laravel 8 framework.
<?xml version="1.0" encoding="UTF-8"?>
<phpunit xmlns:xsi="http://www.w3.org/2001/XMLSchema-instance"
xsi:noNamespaceSchemaLocation="./vendor/phpunit/phpunit/phpunit.xsd"
bootstrap="vendor/autoload.php"
colors="true"
>
<testsuites>
<testsuite name="Unit">
<directory suffix="Test.php">./tests/Unit</directory>
</testsuite>
<testsuite name="Feature">
<directory suffix="Test.php">./tests/Feature</directory>
</testsuite>
</testsuites>
<coverage processUncoveredFiles="true">
<include>
<directory suffix=".php">./app</directory>
</include>
</coverage>
<php>
<server name="APP_ENV" value="testing"/>
<server name="BCRYPT_ROUNDS" value="4"/>
<server name="CACHE_DRIVER" value="array"/>
<server name="MAIL_MAILER" value="array"/>
<server name="QUEUE_CONNECTION" value="sync"/>
<server name="SESSION_DRIVER" value="array"/>
<server name="TELESCOPE_ENABLED" value="false"/>
</php>
</phpunit>Defining your own env vars in Laravel testing environment
Sometimes as your app is growing you might need to add more env variables to your testing environment. There are two ways you can do this first you can create a file called .env.testing and place this file in your project root directory.
Secondly, you can directly add this env vars to phpunit.xml file. Make sure whenever you modify your env var you need to run following command so that your new changes will take effect immediatly.
php artisan config:clearHow to create your first unit or feature test?
Laravel comes with command line utility called artisan you can use it in order to create a new unit or feature test file. Go to your project root directory and open terminal window and let start creating a new unit or feature test file.
# Create a new Feature Test
# Below command will generate a new file under tests/Feature directory
php artisan make:test PaymentTest
# Create a new Unit Test
# Below command will generate a new file under tests/Unit directory
php artisan make:test UrlHelperTest --unitAlright, you might be bored so far however I assure you that you will enjoy my journey to write unit test together. You will learn a lof about unit tests in upcoming tutorial stay tune.
In next tutorial we will start writing some unit tests. Please like and share my articles and keep motivate me to write some awesome articles.